Mining bitcoins – a process that helps manage bitcoin transactions as well as create new “wealth” – is the new Beanie Babies. Luckily for us, however, bitcoins seem to be going up in value and should maintain their value over time, unlike your mint condition Tiny the stuffed Chihuahua.
But how do you get bitcoins? You can begin by buying them outright, but the market is currently wild. At $188 per coin, the direction of the bitcoin is anyone’s guess right now and, unlike equities, these things don’t split. In short, you should probably mine. But what is bitcoin mining?
Think of it as work done by groups of people to find large prime numbers or trying keys to decrypt a file. You can read a lot more about it here but just understand that for every block mined you get 25 coins or, at current rates, $4,722.25. Currently a single bitcoin is valued at $188, an alarming result that is probably caused by money movements related to Cyprus and a general bubble-like excitement over the platform in general. In fact, many wager that the DDOS attacks on many bitcoin-related services are direct action by hackers to inject instability in order to reduce the price.
As it stands, mining solo is very nearly deprecated. The process of finding blocks is now so popular and the difficulty of finding a block so high that it could take over three years to generate any coins. While you could simply set a machine aside and have it run the algorithms endlessly, the energy cost and equipment deprecation will eventually cost more than the actual bitcoins are worth.
Pooled mining, however, is far more lucrative. Using a service like “Slush’s pool” (more on that later) you can split the work among a ground of people. Using this equation:
While this is simplified, it is basically how the system works. You work for shares in a block and when complete you get a percentage of the block based on the number of workers alongside you, less fees. Using this method, I have been able to raise about $1.50 over the weekend by running a dormant PC. The astute among you will note that I probably used twice that amount of electricity.
Being a neophile, I’m surprised it took me so long to start mining.
1. Get a wallet. You can either store your wallet locally or store it online. Coinbase.com is an online wallet that is surprisingly simple to set up. Wallets require you to use or download a fairly large blockchain file – about 6GB – so downloading and updating a local wallet may be a non-starter. Like all wealth storage mediums, keeping your bitcoins “local” is probably a better idea than trusting a web service, but that’s a matter of private preference. There is no preferred wallet type and there are obvious trade-offs to both. Privacy advocates would probably say a local wallet is best.
You can download a local wallet here but make sure you keep a copy of your data backed up.
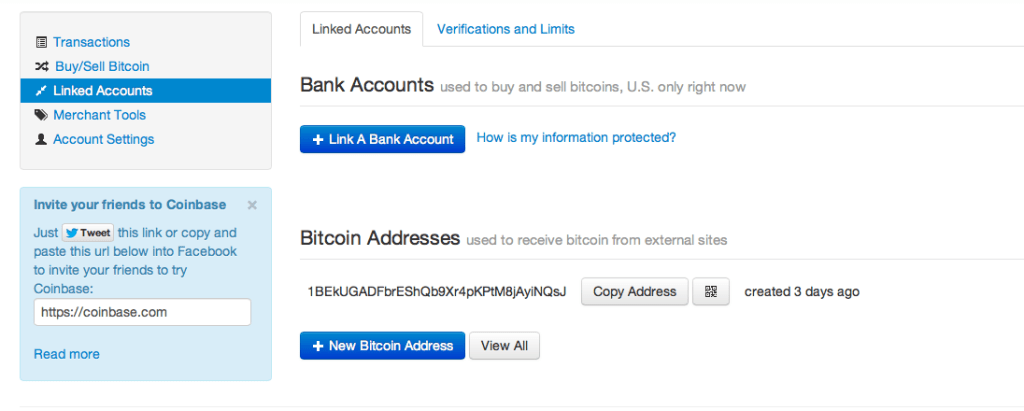
Once you’ve created a wallet, you get an address like this: 1BEkUGADFbrEShQb9Xr4pKPtM8jAyiNQsJ. This, without the period, is a direct way to send bitcoins to your wallet. Make a note of your address. In Coinbase, the wallet address found under linked accounts.
2. Join a pool. To mine in a pool you have to work with a group of other miners on available blocks. The most popular is Slush’s Pool found here. You can also try guilds like BTC Guild as well as a number of other options. Each of the pools is characterized mostly by the fees they charge per block – 2% for Slush’s pool, for example – and the number of users. Pools with fewer users could also have a slower discovery time but pools with many users usually result in smaller payments.
How can you be sure the pool owner doesn’t steal all your bitcoins? You can’t. However, as one pool owner, Slush, notes:
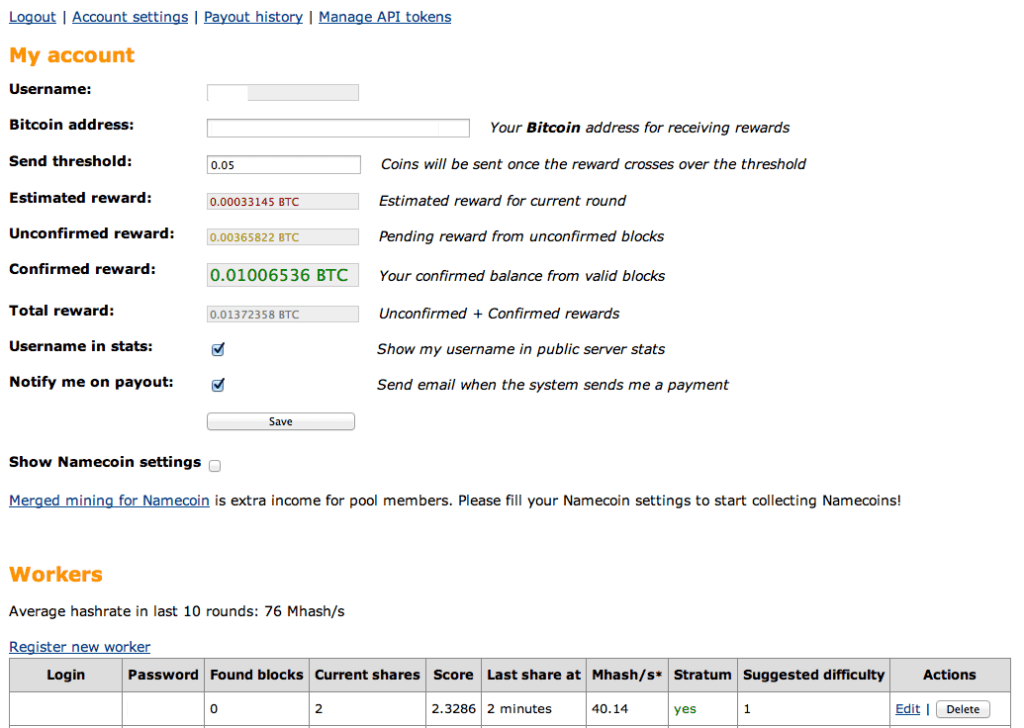
For simplicity’s sake, I’m using Slush’s Pool and have created three workers. First, create a pool login. Then add workers. The workers are sub-accounts with their own passwords and are usually identified by [yourlogin].[workername]. I have three workers running, currently – one on my iMac and two on my old PC.
You must create workers to mine. The instructions are very straightforward for most services so don’t become overwhelmed. Like any online club, you can dig deeply into the subculture surround bitcoin as you gain experience. I like to think of it as a financial MMORPG.
Also be sure to enter your wallet address into the pool information. This will ensure you get your bitcoins.
3. Get a miner. There are a number of mining options for multiple platforms although OSX users may find themselves in a bit of a pickle. Miners use spare GPU cycles to power the mining operation, much like services like SETI@Home uses spare cycles for finding intelligent life. Miners, on the other hand, use these cycles to help handle peer-to-peer processes associated with bitcoins. Thus by doing “work” you are maintaining the network as well.
GUIMiner is the simplest solution for Windows users as it allows you to create miners using almost all standard graphics cards. You can download it here. 50Miner is also a popular solution. Both require you to enter your worker info and pool and they’ll start mining.
Linux users can run miners like CGMiner. An excellent guide to installing a miner on Ubuntu isavailable here.
OS X users can use DiabloMiner, a two-year old command-line program that will mine using OpenCL. Sadly, it uses deprecated calls to Bitcoin and is quite a bit slower. As a result, you need to run your own proxy, Stratum, that allows Diablo to connect with services like Slush’s pool. Both of these programs usually run without issue on OS X although you may need to install OpenCL for OSX.
To mine I’ve created a script that I run in Terminal that simply runs the proxy in the background and then connects Diablo. Note the last two arguments are necessary for Mountain Lion.
./DiabloMiner-OSX.sh -u WORKERNAME -p WORKERPASSWORD -o localhost -r 8332 -w 64 -na
RPCMiner is far easier to run – you simply click an icon and enter some data – and both have very rudimentary, text-based interfaces. Running Diablo on my iMac has not had much effect on application performance under OS X although it does slow down my Windows 8 machine considerably.
4. Keep your mind on your money. Bitcoins are baffling in that they are wildly simple to use and mine. Speculators, then, would probably be able to throw hundreds of machines at the problem and gather bitcoins like raindrops, right? Wrong. As more bitcoins are found, they become more difficult to find. This profitability calculator will help you understand what you’re up against but understand that this isn’t a sure thing. I’ve run my systems for a weekend and seen a mere $1.50 – enough for a coke – but other users may have improved hardware and methods to succeed. In short, if it costs more to run your hardware than you gain in bitcoins, you’re probably doing something wrong.
Good luck in your journey and enjoy your first foray into this wild and wooly world.


