Isn't it wonderful to reminisce moments which occurred few years ago? Those happenings you had captured into digital copies or perhaps in a film. I know film is already obsolete these days because of digital cameras. I believe that digital photos have also made photography available to everyone. Anyone with a mobile phone capable of taking photos is considered a photographer thus the mobile photography term has been born. Professional photographers are also investing in much more expensive gears and accessories to enhance their art. Film makers giving more effort in their video editing because of the competition as well.
However, I truly believe that although there are lots and lots of available online resources for posting these digital photos on the web as well as videos, it is still beautiful to find a tangible copy on the table top, or the photo album shelves.
♥♥♥ Why I Keep A Photo Album? ♥♥♥
Back on my earlier days, I have kept several photo albums and are displayed in our living rooms. These are still available until these days however, there are some photos which have been destroyed by fungi and other bacteria that the images aren't clear anymore. But most of these images are still kept in my albums and it was really beautiful to scan through them once in awhile.
Video credits: Jean Beltran-Figues via bitLanders.com
When the blackout occurred last month, (I blogged about the ways on how to create lights during blackout as well) one of the things that I did was to look back and scan on those photos. It brought memories of course and I couldn't help but smile and laugh as well as I recall the events which had happened. I recalled friends, high school loved ones and even the funny moments. It was such a breather to see those old faces, those days when we were still young, active and skinny as well. The old faces had reminded me that the times had changed indeed but the memories stay. These photos are the proofs to this.
I recall my college instructor told us that if in case there's famine, tragedy or whatever circumstances that may happen, her photo albums and photographs will be the first thing she'll save. We asked why and she answered, because people may change but memories captured in a photo don't. And I agree with her.
♥♥♥ Introduction to Photobooks ♥♥♥
Previously, I had posted a tutorial on how to use the Photobook Designer software to create photobooks such as the one I had ordered online and have it delivered to our doorstep. I already have around six photobooks and I am still printing more and more.
Photobooks and How to Make One
The photobooks which can be ordered online can accommodate international clients and they are also giving the photobook codes for discounts in certain sites. I was able to avail certain codes though and that allowed me to have my photos printed in such low cost and I have only paid shipping fees.
Video credits: Jean Beltran-Figues via bitLanders.com
I do hope that those who had read the tutorial was able to apply the steps and found themselves creating their own photobooks too! I was grateful that I was able to share this to the bitLanders community because it is always nice to go back and recall the memories you have specially to those who have kids.
Kids grow fast and before you know it, they are already grown ups and will soon leave your side for work and perhaps to be with their husbands/wives if they are ready enough. So it is really nice to document their growth and have them printed. Once we are already old and are not anymore capable of viewing these photos on a monitor screen, the photobooks which are tangible will serve as a remembrance.
♥♥♥ Mobile Photobook Application ♥♥♥
On that previous tutorial, I had explained the steps for the desktop software. Today, while checking online, I figured out there's a mobile version of the said application and I was really intrigued that I tried creating one. Here's the procedure and this is an actual photobook creation straight from my Samsung Note 4.
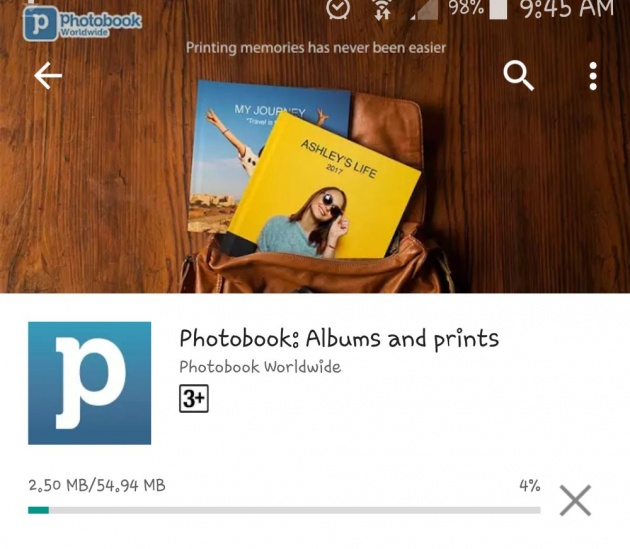
Image credits: Jean Beltran-Figues screenshot via Photobook Android App
I definitely believe that with this mobile application, it opens up to everyone who have mobile phones capable of downloading the app to create their own photobooks too! Great news, the application supports those photos taken using the mobile phone of course!
Step 1. Download the app on your mobile apps store.
Whether you have an iOS or Android device, this application is available on those platforms. I was stunned that this is available on mobile but it was indeed amazing to be able to do the things I can do on the desktop app on my mobile too! It seems developers are now trying to storm us with these apps that the need for computers will soon be optional.
I have an Android device, specifically a Samsung Note 4 and so I went to the Playstore and searched for the application, it did come up and I downloaded it. It installed itself afterwards and I went and open it immediately.
The app's main screen shows a couple of sections and options as below:
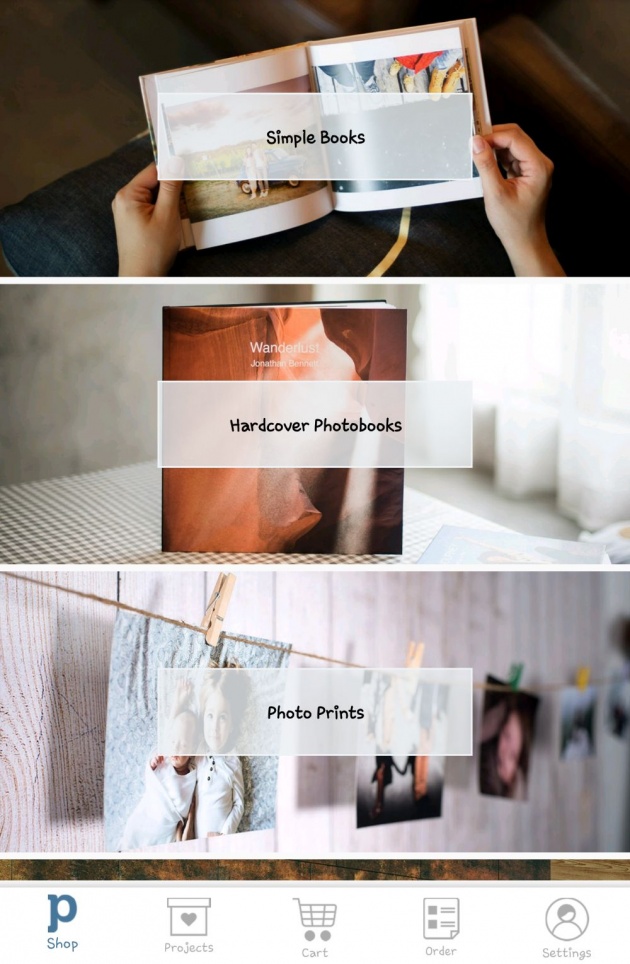
Image credits: Jean Beltran-Figues screenshot via Photobook Android App
♥ Shop ♥
This is where you select the products you want to order. Actually, you can select any and proceed with the steps - adding photos and all without checking out.
For today's project, I have selected the Simple Books, this option has 6"x6", 8"x8" and 12"x12" sizes. I have selected the 6"x6" for now. There are also other products such as Hardcover Photobooks with Layflat or Standard Binding options, Photo Prints with 4R and 5R options, Home Decors such as Canvas Air, Metal Print, Wooden Print and Desktop Plaque, then there's Calendars too which has options for wall or desk types.
♥ Projects ♥
This section lists the projects you have created. It shows the completed ones and the incomplete as well. So even if you don't want to check out the project, that's okay, the app will save these up in this section.
Once you have enough amount to check out, you can go directly on this section and proceed.
♥ Cart ♥
The cart hold the projects which you want to check out. This also becomes empty if you don't have anything yet ready for check out. So everything that comes here is temporarily stored until you proceed paying for it.
♥ Order ♥
This page shows all the orders you had made with the application. The paid orders, the processing and others will be listed here. If the order is still processing, the status will be mentioned as well.
♥ Settings ♥
This is self explanatory however, this page here shows the things such as Email address for the account, the Support page such as the FAQs and also it lists down the terms and conditions for the application.
Step 2. Select your photos
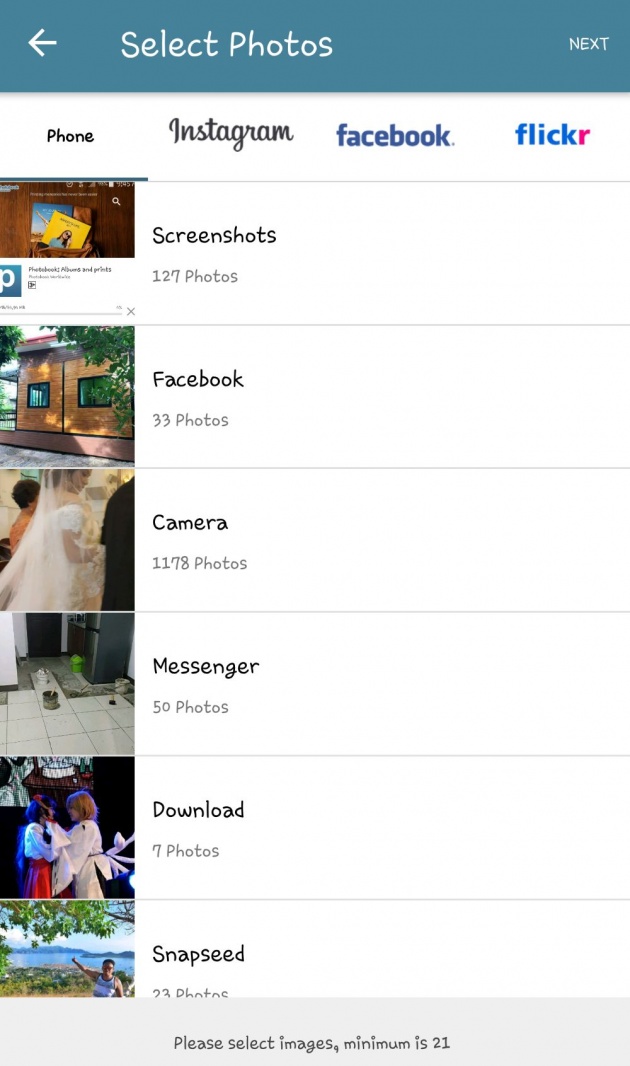
Selecting the photos comes next. The app provides couple of options where to get the photos or images that you can add on the project so it is important to decide where you'd like the images taken from so you can prepare them.
Depending on the selected product, the app will ask you to select the number of photos.
My mobile photo albums. Image credits: Jean Beltran-Figues screenshot via Photobook Android App
A. Mobile Photos
The default photos taken on the mobile device can be imported into the photobook project. This is what I want for the current project.
Note: There's an issue with Android devices where in the phone will ask for permission on screen overlaying applications, you can get rid of it by going to the settings - application overlay and try disabling a couple of apps. I have disabled a few other apps and the Photobook app opened the mobile photos eventually.
Selecting the photos is very easy, done by simply tapping on the images listed on screen.
B. Instagram
Selecting the Instagram tab will let you capture photos you have posted on Instagram. By clicking on Connect to Instagram, the app will try to access your Instagram account after you allow them to do so and show you the list of your Insta images.
GIF credits: Jean Beltran-Figues
C. Facebook
The same thing with Instagram, allowing the connection will let the app access the Facebook photos you have posted. There's however a downside to this as it will not show the list of albums but instead show all your uploaded photos at a time.
I do hope they can enhance this part so the app will show the albums instead and it would be easier to navigate to the images.
D. Flickr
This is the same with the first two before this option. Allowing the connection will allow the app to access the images from Flickr. Of course the app will ask you to sign in first to do so.
Step 3. Create Photobook.
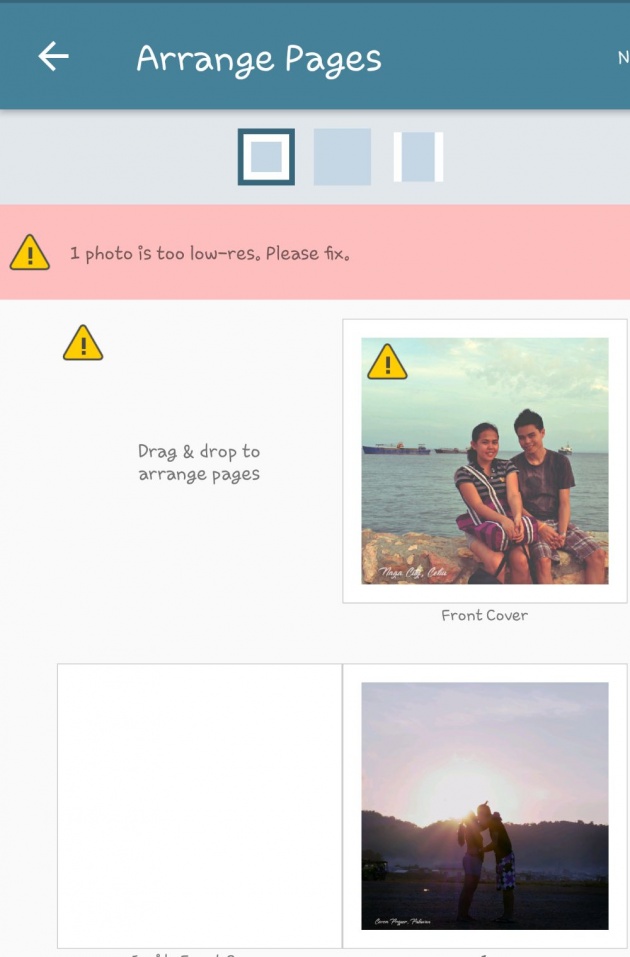
This step will let you arrange the pages of your photobook. Unlike the desktop application which allows you to have specific layout for each page, this will only apply one image per page, it will cover the entire page if you have selected that option.
Drag and drop for pages. Image credits: Jean Beltran-Figues screenshot via Photobook Android App
The page has the option to either have a margin for the four corners, or cover the entire page or perhaps a portrait form of page layout.
Aside from that, the page can be rearranged by drag and dropping the pages. Though it allows you to select the number of images according to the project selected and size, it still allows you to add more images once you are in this section however, it will also incur additional charges for the extra pages added.
And of course you can also delete the image added by tapping on the trash button which will enable the delete button to each images, press on each photo's trash button to confirm.
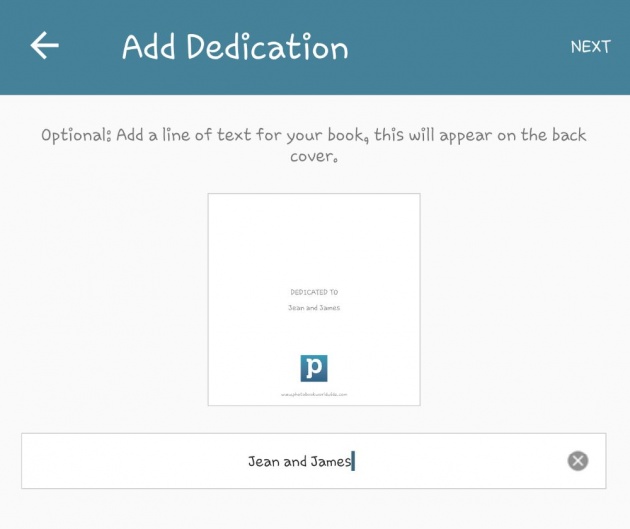
Dedication page. Image credits: Jean Beltran-Figues screenshot via Photobook Android App
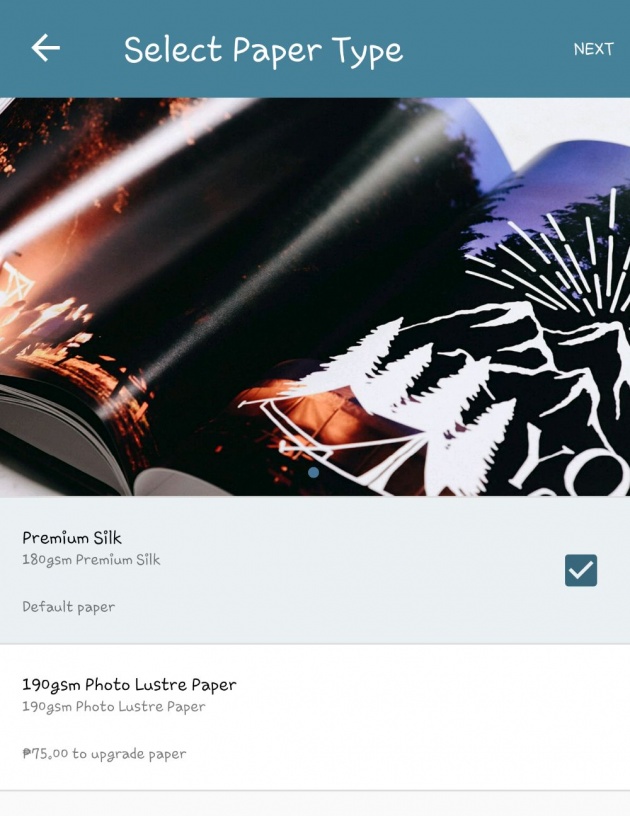
Photo paper selection. Image credits: Jean Beltran-Figues screenshot via Photobook Android App
A dedication line of text will be added as well to be printed at the back of the photobook. I added my husband's and my name in it.
Another option is to select what type of paper for the photobook, either Premium Silk or Photo Lustre Paper which will add Php 75.
Step 4. Add to Cart and Check out.
On the check out portion, the app will asked for the Photobook Worldwide account. I entered my email address and it sent a verification email to my mailbox. Once verified, I then went back to the app and proceed with the check out.
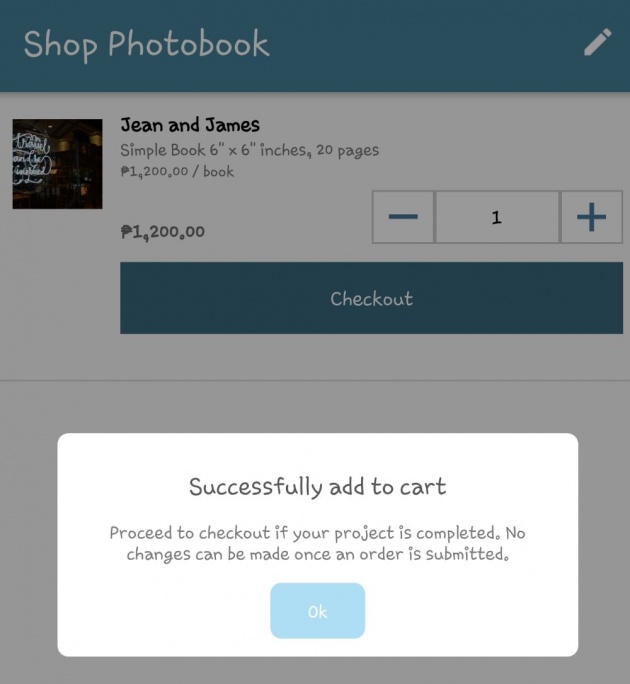
Cart listed my project. Image credits: Jean Beltran-Figues screenshot via Photobook Android App
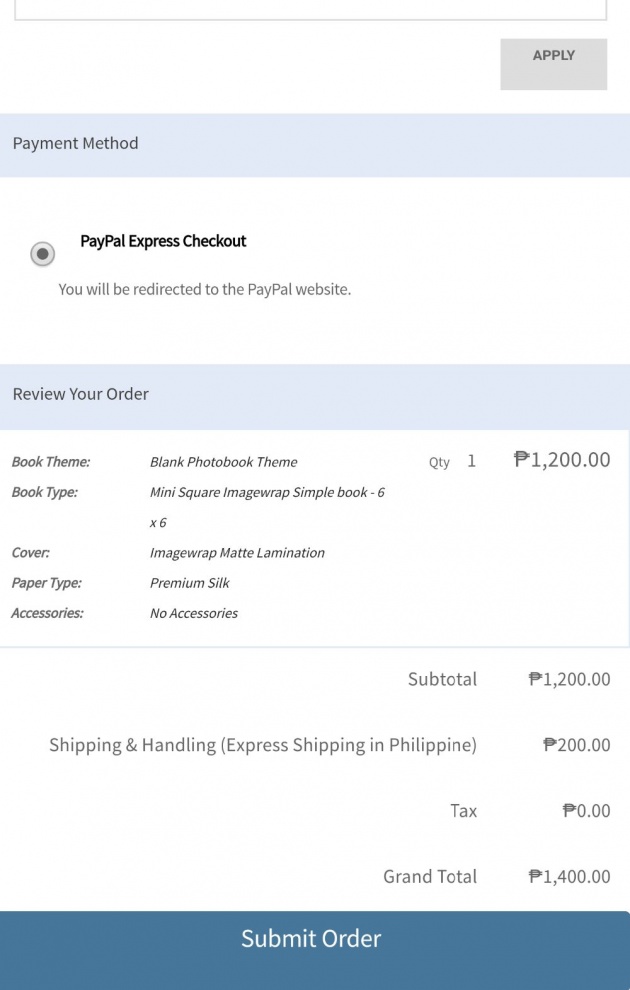
Order summary page to review the order. Image credits: Jean Beltran-Figues screenshot via Photobook Android App
Billing address is required as well as the delivery address, the customer details and the shipping method. I have selected Express Shipping which will take around 5-7 business days which costs only Php 200.
Discount codes are also available in this section. I have my own discount code and so after inputting it in the coupon code box, it reflected the total amount. And finally, proceed with the payment.
Currently, the app has PayPal option only. However, if you don't have any PayPal funds, there's an option to pay thru a bank credit or debit card afterwards. Submit the order and it will start uploading the project to their server. This will take a couple of minutes and once successful, you'll find the project order status as Processing. It will take 5-7 business days for the order to be delivered.
Now I wonder if the same delivery will happen with my previous orders as I have received the orders in around 4 business days from the date of request. So far, I have no issues with their delivery service which is catered by DHL.
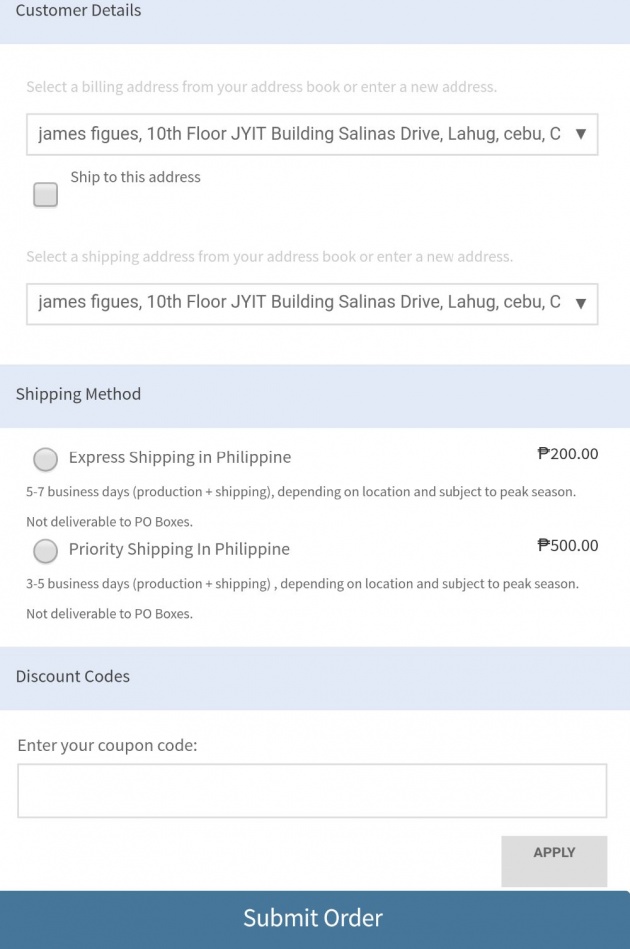
Order submission page. Image credits: Jean Beltran-Figues screenshot via Photobook Android App
I do hope this helps and guide you with the process of creating your photobook on your mobile. If I would select which one is my favorite, I will still go with the desktop app because it allows me to select the layout of each page which means, I can select unlimited number of images to be added on each photo according to the layout. I can also add texts and other accessories unlike the mobile part where in it will only let you add the photo, move the images and that's it.
But I still like the fact that I can make photobooks while on the go. Portability is an important aspect for software development!
Best regards,
Jean Beltran-Figues


