Welcome to Querlo Tutorials! In this tutorial series, we will show you some basics on how to use Querlo. Today, you'll learn how to create a chat.
Step 1:
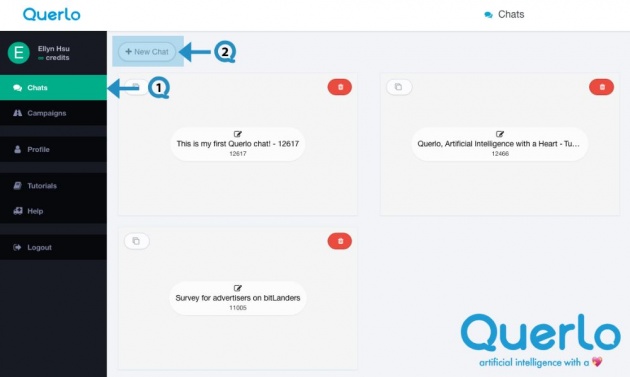
After logging in to Querlo, you'll see a menu on the left side of the page, click "Chats" (Q1). Then click the "+ New Chat" button (Q2).
Note: "Chats" is the page where you can see and access the list of all your chats.

Step 2:
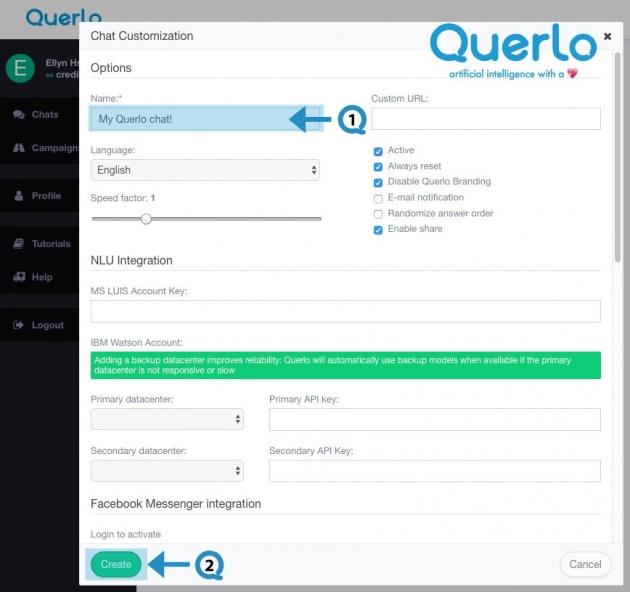
A pop-up window labeled "Chat Customization" appears.
In the "Name" field enter a title that is suitable for your chat (Q1) so that people who chat with it know what it is about. Keep the default options and click the "Create" button (Q2) which is located at the bottom of the page.
Note: "Chat Customization" is the page where you can change some options to customize your chat. We will explain its features in detail in other blogs.

Step 3:
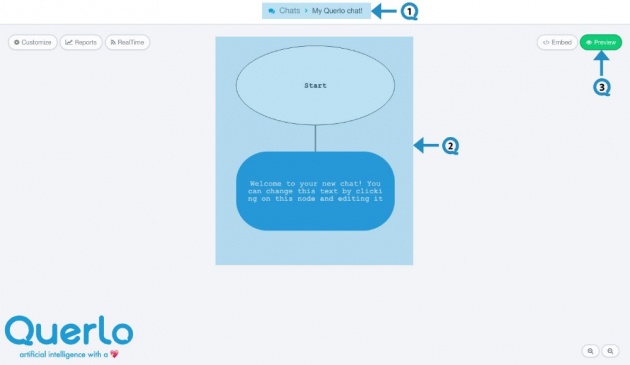
This is the chat builder.
On the top of the page, it shows the title of the chat (Q1) so that you know which one you are editing.
The highlighted area in the middle is the chat builder which you can edit the content for your chat (Q2).
Click the "Preview" button (Q3) to open the chat HTML client which shows you how your chat is presented to the viewers.

Voila! You have created your chat!
**All the images used in this blog are credited to www.Querlo.com


