Welcome to Querlo Tutorials! In this tutorial series, we will show you some basics on how to use Querlo. Today, we'll talk about the chatbot builder and you'll learn how to add a "New Image Link".
Step 1:
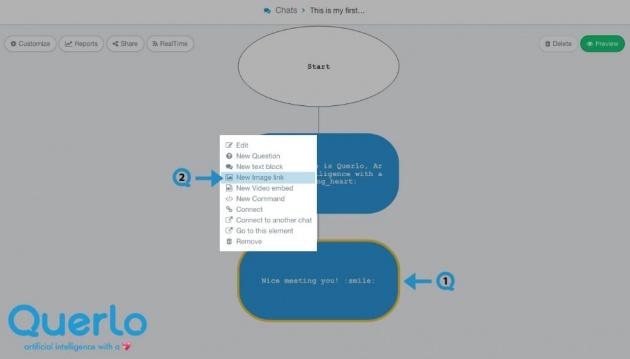
Click on the last node to access the contextual menu (Q1) which contains all the actions you can perform on the selected node. Choose "New image link" (Q2).
In our example, the last node is a text block which is a blue rounded rectangle. (Read related article: The Types of Node)

Step 2:
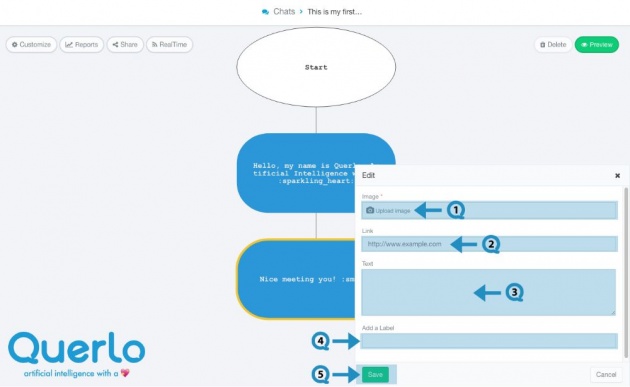
This is the "Edit" form where you can modify the content of this node.
(Q1): Image. Click "Upload Image" to upload your image.
(Q2): Link. Add a link to your image.
(Q3): Text editor. Type your text here.
(Q4): Add a Label. Labels are used to reference nodes in various functions of the chatbot builder.
(Q5): Save.

Step 3:
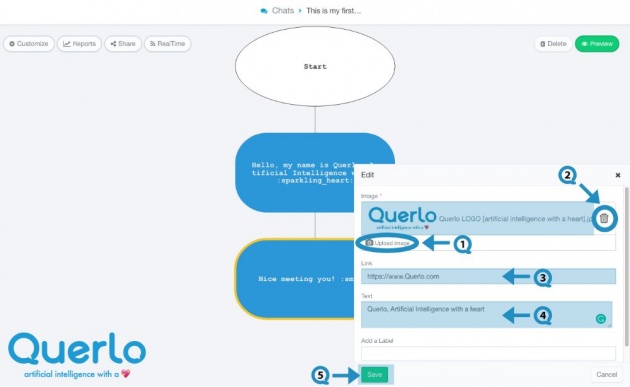
Let's add an image to this node.
(Q1) Click "Upload Image" to upload your image.
(Q2) If you want to delete the image that you have uploaded, just click on the "Trash bin" icon.
(Q3) Add a link to the image. Here we have added "Https://www.Querlo.com"
(Q4) Type some text in the Text editor. Here we have entered "Querlo, Artificial Intelligence with a heart".
(Q5) Click "Save" to save your change.

Step 4:
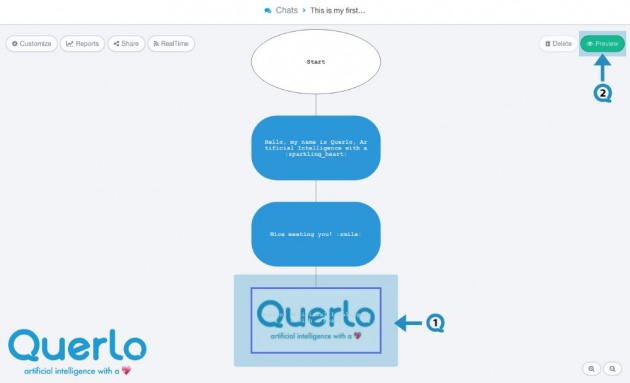
Now, you see the highlighted area is the node with the image (Q1) that we uploaded in the previous step.
Click the "Preview" button (Q2) to open the chatbot HTML client which shows you how your chatbot is presented to the viewers.

**All the images used in this blog are credited to www.Querlo.com


