Hey guys! How are you all doing? I hope you are all well and doing good! Lately, I've been so grateful to Bitlanders for giving me quite a good rating for my previous blogs. I know I'm far from acquiring a 5 stars blog, but 4 stars ain't bad you know? So because of the great feedback, I was feeling motivated to continue writing here. I've mentioned to my previous blog which is Food-Diaries: My Marugame Udon and Tempura Experience that I might write about Steemit next. But I think I need more time to study it first before proceeding with writing.
But I have a good news for you! I'll be sharing a simple way to edit your videos using just your mobile phone. In this Hi-Tech generation, wherein everything you need or want to do is provided by the web, it is very easy for us to accomplish photo and video editing.
Flashback: I can still remember way back then, back on my High School days that for us to able to edit our photos, videos or movies for school we need to use Windows Movie Maker. I know some of you still remember this, despite tons of apps nowadays. It's funny to think that was just a few years ago.
Technology had been emerging and continuously developing during these days. I, sometimes think that every time I just blink something was made or improve already. But this ain't surprising, right? Okay, enough for more talks. I was never a Technical person, I always wanted to try and learn about stuff but I end up doing another thing. Even in my craft, although Traditional Calligraphy is still in the business, I must admit that Digital Calligraphy is fast approaching. So with that, I, a low-tech person search my own way to catch up with them. If you ever visit my Movies section, there you'll see my latest post about Time-lapse Calligraphy. It was such an enjoyment to record my writing. Using my mobile phone, I was able to record and time-lapse my Calligraphy while I was writing it. How fun it was! But I noticed that the video was kinda boring so I decided to edit it to make it better and fun to watch with. Last year, as I edit our practice video for our dance entry to our company's Christmas party, I installed this app named FilmoraGo on my Android phone.
Photo Credits: Yannn via bitlanders.com
Filmora is known for its incredible video editing software, so it is no surprise that their video editing app FilmoraGo maintains that high standard. This app allows you to do the basics like trim and cut, render, create subtitles and text, speed up the content, add filters, and add overlays.
One of FilmoraGo’s most impressive features is picture-in-picture, which lets you insert a second video or still photo, adjust its size and position it wherever you like over the first one. You can even decide when it appears and apply a transition, so it spins, slides or fades into place.
-Source: quora.com
Without any knowledge, I randomly go to Google Play Store to search for a video editing app and luckily I came across this app. Well, I haven't used this App that much, not until now. I find this application very convenient for me, for everywhere I go I can just open this app, edit my videos and let the app do its thing. I know you're thinking that there must be way better app than this, maybe but now I'm good using this. To prove to you that I'm having fun using this app, this is the recent edit of my Time-lapse calligraphy using Filmora Go App.
Video Credits: Yannn via bitlanders.com
As of now, I've got 6 videos edited using this app. But so far this one is my favorite. So here's a simple way to use the FilmoraGo app in editing your videos.
• STEP 1: INSTALL THE APPLICATION TO YOUR MOBILE PHONE •
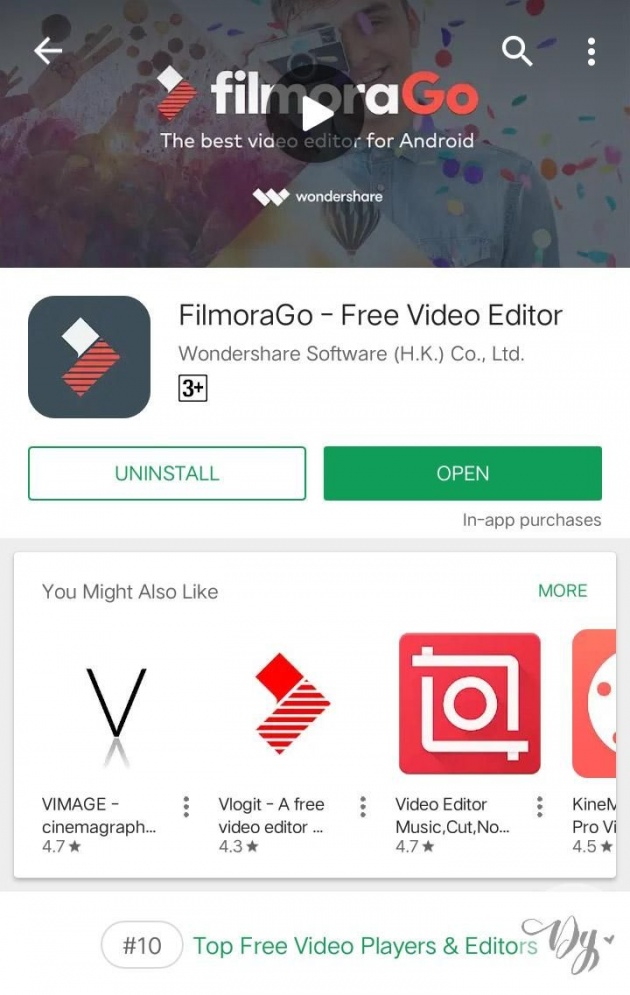
Photo Credits: Yannn via bitlanders.com
The first thing to do of course is to Install the App on your Mobile Phone. Good news for everyone, this application supports both Android and Apple phones so I'm sure it will suit whatever Operating System your mobile phone has. As for me, who's an Android user I downloaded the Application in Google Play Store as I mentioned earlier. Upon searching the app, Google Play store indicated ratings, comments and how many people had been downloading the app. I may lack knowledge when it comes to such field, but I can clearly recognize what is and what is not a worthy app to install with. Lol! With a current rating of 4.4 Star, good feedback and over 10 Million Android users who've downloaded the said App, I can say that this is worth a try. So let's see how worthy this app works shall we??
After downloading the app next thing to do is to try it. Of course, to see how good the app is you might as well need to try it right?
• STEP 2: CHOOSE WHAT VIDEO YOU'D LIKE TO EDIT •
I'm not your typical Photographer or Videographer, but I assure you that I am your typical artsy nerd. So most of the videos that I possess are my time-lapse calligraphies and paintings (This is aside from my Animes and kdrama that I've downloaded lol). So I've chosen a recent time-lapse video I recorded. About the video, it is a brush calligraphy of a lyrics from the Korean Drama I'm currently watching. You just need to add the video in the frame.
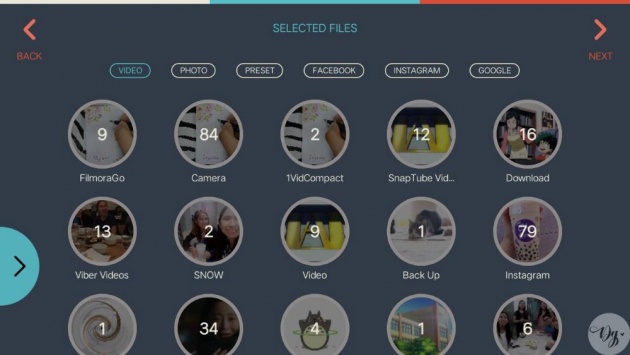
Photo Credits: Yannn via bitlanders.com
The photo above shows the list of videos I have in my storage. You can freely choose any video in your local storage, in your own social media or you can even search through Google. Isn't great? But of course, you'll be needing an Internet Connection to be able to search online.
As for me, I haven't tried searching through the web. I usually edit videos of my own. Besides, I only got a motivation to edit whenever I thought of something creative or intended as a need. You can add more than 1 video as if to make it a collage of videos.
• STEP 3: BASIC EDITING OF CLIPS •
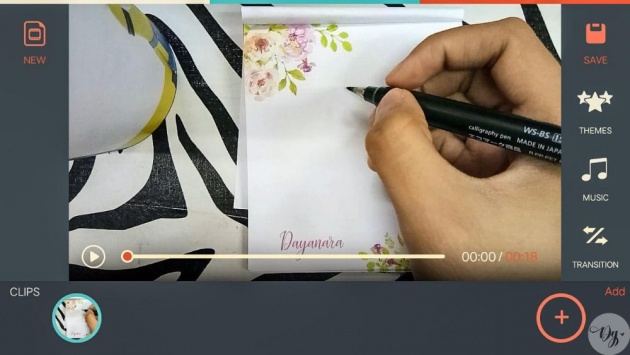 Photo Credits: Yannn via bitlanders.com
After adding the clip/video you wanted, there will be a basic editing for the video. This consists of the following:
• THEMES - Here you can choose a theme that suits your video. Currently, there are 8 themes installed in the app this includes 80's theme, Fashion theme, Winter themes, Chaplin theme, Love theme, Concert theme, Children theme and Mirror theme. If you think your video doesn't fit among those themes you can set it as None.
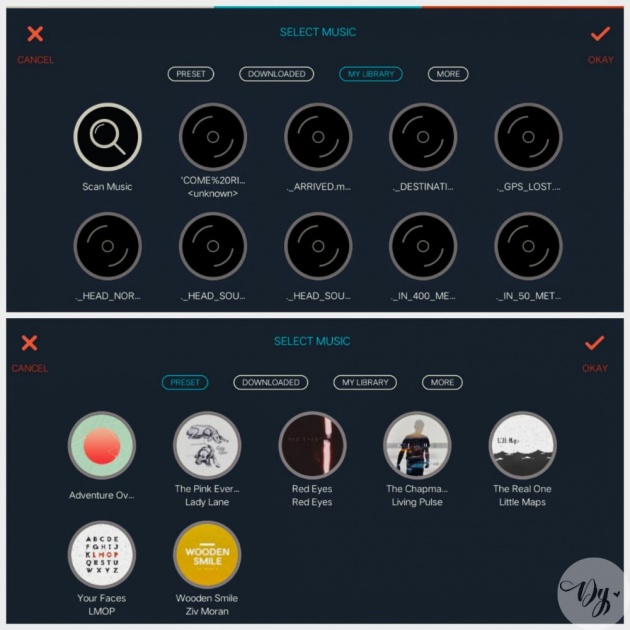 Photo Credits: Yannn via bitlanders.com
• MUSIC - Here you can add the music you prefer in your video. Just like adding a video, here you can choose whether you want to use a music downloaded to your mobile phone or search online. As for me, I downloaded the music I used in my video. As I mentioned earlier, the calligraphy I wrote is from the Korean Drama I'm watching. Well to be specific, it's one of the OST in the series. It's actually my favorite among the soundtrack. A song named "When I Saw You" by Bumkey. Lately, I've been listening to the soundtrack of A Korean Odyssey in Spotify and I must admit that I've been LSS to this song. (Even though I didn't understand some of the lyrics because it was in Hangul)
But as much as I enjoyed writing lyrics and adding the music itself, I also tried those installed background music in the app.
Video Credits: Yannn via bitlanders.com
I had this time-lapse of blending two colors of leaves using Miniso's Brush tip pens. It was a fun time-lapse to watch with but to make it more appealing, I added a background music installed in the app. I am not sure about you guys but I think the background music fits my video somehow.
• TRANSITION - This portion only applies for 2 videos and up. It was used between every start and end of an added clip. Surprisingly there are 19 transition effects installed in the app. The followings are Black & White, Pixelate, Fisheye, Expansion, Division, Bounce, Distort, Rock, Camera, Roll, Push, Bandslide, Cascade, Dissolve, Wipe, Split, Shutter, Zoom, and Radar.
• RATIO / CROP - From the title itself, here you can choose the size of your video. From 1:1 to 16:9 to 21:9, also you can cut the sides or add a frame to suit in your Instagram or other social media. Lastly, there are Blur and black option too.
• STEP 4: DETAILING EDIT OF CLIPS •
Below of Ratio and Crop portion, you'll see an Edit tool button. After you click it, you'll be able to edit every clip you added.
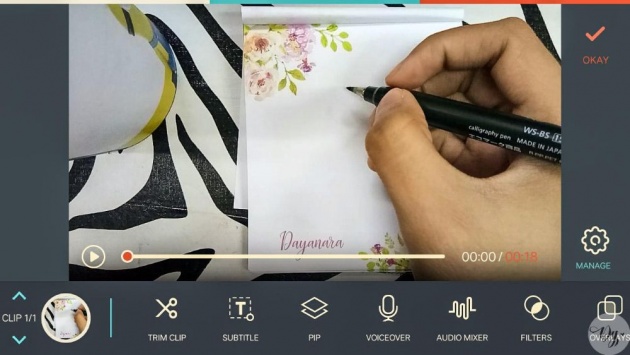
Photo Credits: Yannn via bitlanders.com
Here's a run through of every editing tools:
• TRIM CLIP - This tool will allow you to trim a specific video. If you want to get rid of a specific portion of the video or just wanted to get a portion of the clip then this tool can surely help you.
• CROP - Just like cropping a normal photo, this tool will help you to point out or simply crop a portion of video by zooming or pinching or drag to resize the video.
• SUBTITLE - Just like in a movie, here you can add subtitle too. But as for me, I used this portion to add my username to serve as my watermark.
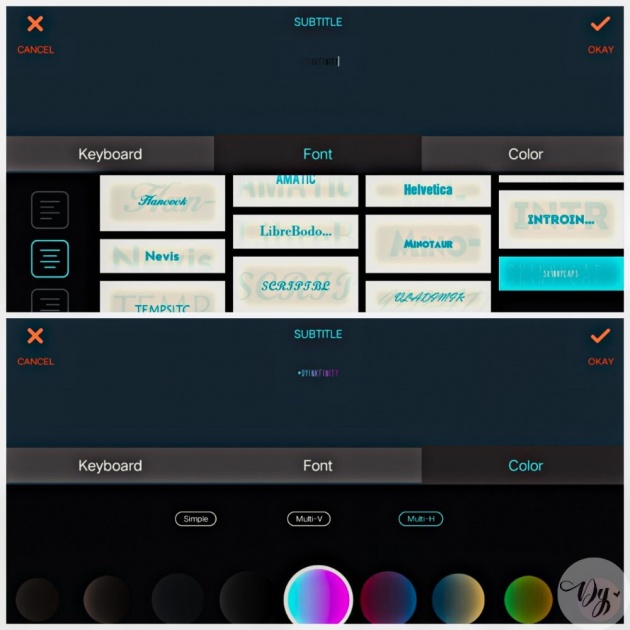
Photo Credits: Yannn via bitlanders.com
You can choose your desired font from the App. Aside from that, you can also choose whatever color you want. As for me I always choose the font named Bebas and a Multi-Horizontal color of Peach and pink or Black and gray as the color of my font.
After adding the subtitle, you have the chance to choose an Intro style on how you wanted your subtitle to appear. There is a couple of styles installed in the app but most of the time I used the Fade style kind of Intro.
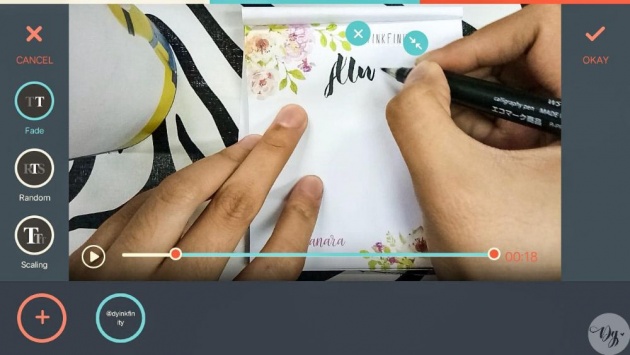
Photo Credits: Yannn via bitlanders.com
You can also edit what part of the video you will insert it. As for me, I put the subtitle after a few seconds past until the end of the video.
• PIP - This tool allows you to insert a photo in your video. There are also transitions that you can use on how it will appear in your video.
• VOICEOVER - This is one tool I love to try. This will able you to add your voice to the video. (Maybe I'll edit a video with me singing in the background next time lol)
• AUDIO MIXER - This one is a cool tool too. You can adjust the volume of the sound in the video, the music you added and the voice over you added. It's a matter of what you wanted to distinct more. You can even mute the sound recorded in the video.
• FILTERS - I guess we are all familiar on what tool is this. You can select a filter of your choice installed in the app.
• OVERLAYS - This is much similar to filters, but the difference is overlays installed in the app are moving. There's a couple overlay installed in the app that you can choose from.
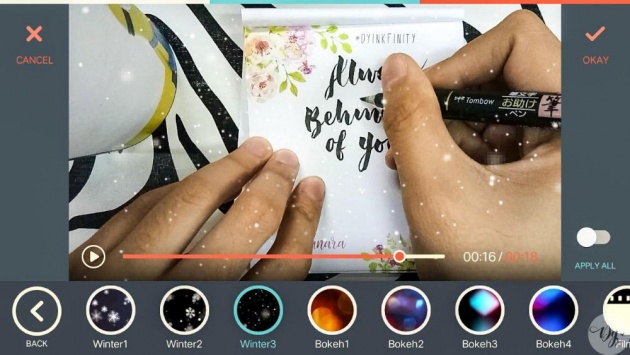
Photo Credits: Yannn via bitlanders.com
Gladly, there was a snow-like overlay that made me remember a certain romantic scene in the drama so I decided to use it to add some Feels whenever I'm watching it.
• ELEMENTS - These are a bunch of cute moving things you can add to your video. There are arrows, planes, heart and fog like-theme.
• TITLES - If you are editing a video for someone like a dedication video, this tool is perfect for you. There are some templates on how you can show the title of your video. You can easily select the appropriate or your chosen theme for your Title.
• SPEED - To be honest this is one of the useful tools for me. Since I'm editing a time-lapse video with a background of music there are instances that the length of my video doesn't fit the portion of the song I want. So here, I can adjust my video, I can make it slower 3/4X, 1/2X until 1/4X. If I can make it slower, surely I can also make it faster by 2X, 3X or even 4X faster than the original speed of the video. Awesome right?
• ROTATE - This tool can help you rotate your video to Right or Left. It can also help you to flip your video Horizontally or Vertically.
• ADJUST - This might be the most used tool in the detailing section. Here you can adjust the brightness, contrast, Saturation, Sharpness, Temperature, and Vignette. These are the tools to make your video look like a high-quality one.
• DUPLICATE - the Last tool is the duplicate tool. By clicking the said tool, another clip will be added but it will be just the same as the first one.
After deciding what to put and not to put in your video let's proceed to the last step.
• STEP 5: SAVE YOUR VIDEO •
You might think we're done already huh? Uh-uh. We don't want to miss the most important step in editing our videos, and that is to save it.
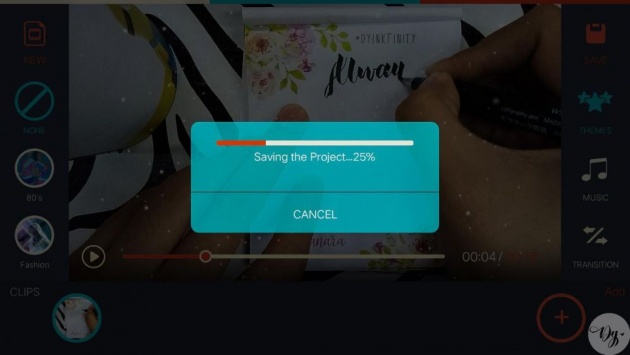
Photo Credits: Yannn via bitlanders.com
All your efforts will be put in vain if we will not save our work. Right? So make sure to wait as the app process the whole editing, then SAVE IT!
In the end, you also have a choice to share it online or on your social media accounts. Or You might as well just save it to your local storage for future use. Lastly, your work is saved in Projects saved section so anytime you wanted to edit or add something in your video, you can simply open your saved projects and edit your video.
Then there you have it! This is how I edit my videos using FilmoraGo App. It's been so useful for me, I hope you also find it useful too.
Meanwhile, If you wanted to see more edited time-lapse videos of mine you might want to check this these links below:
- Timelapse Calligraphy: When I Saw you by Bumkey
- Timelapse Calligraphy: Reckless Love by Bethel Music
- Timelapse Calligraphy: Odd Future by UVERworld
- Timelapse Calligraphy: Dream On
Have a great day everyone!!


